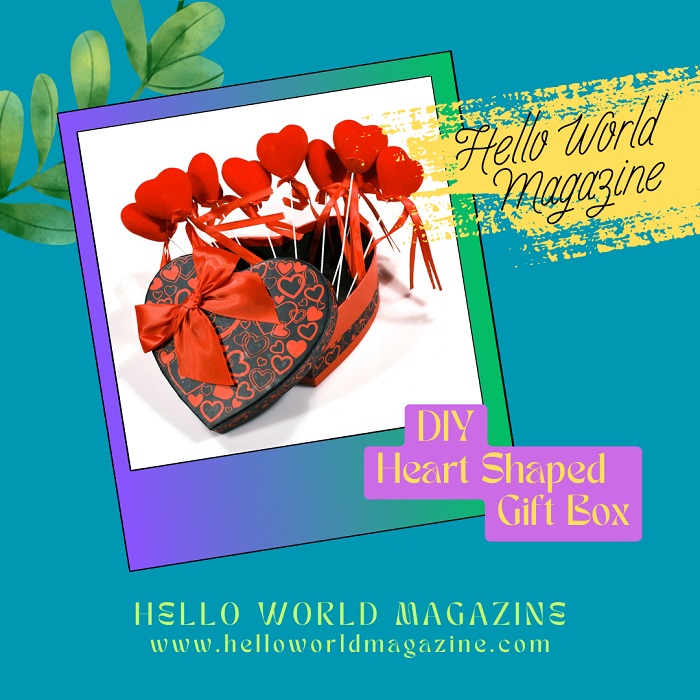
Homemade Heart Shaped Gift Box
The introduction
Making a heart-shaped gift box can be a thoughtful and creative way to present a special gift to your loved ones. Here are the steps to create your own heart-shaped gift box:
Content
- The introduction
- Gather Materials
- Template
- Cutting
- Scoring and Folding
- Assembling
- Finishing Touches
- Fill and Gift
Heart-shaped Gift Box
1. Gather Materials:
– Cardstock or decorative paper
– Scissors
– Ruler
– Pencil
– Glue or double-sided tape
– Ribbon or embellishments (optional)
What are the steps to making a heart-shaped gift box?
2. Template:
– Find a heart-shaped template or draw a symmetrical heart shape on the cardstock. You can use a stencil or even trace around a heart-shaped object.
3. Cutting:
– Cut out two identical heart shapes from the cardstock. These will be the top and bottom of your gift box.
4. Scoring and Folding:
– Using a ruler and pencil, lightly score a line about 1 inch from the edge of each heart shape. This will be the border for the sides of the box.
– To form the box’s sides, fold along the marked lines.
5. Assembling:
– Apply glue or double-sided tape along the border of one of the heart shapes.
– Carefully place the other heart shape on top, aligning the edges and pressing firmly to secure the sides together.
6. Finishing Touches:
– You can further decorate the gift box with ribbons, stickers, or any other embellishments to personalize it.
7. Fill and Gift:
– Once the box is assembled and decorated, you can fill it with small gifts, chocolates, or a heartfelt note. Present it to your loved one and watch their eyes light up with joy.
Creating a heart-shaped gift box can add an extra layer of thoughtfulness to any gift-giving occasion. It shows that you put effort into not only the gift itself, but also the presentation. So, the next time you want to give a gift from the heart, consider making a heart-shaped gift box to make the experience even more special.